Manitoban Gardener

Ranunculus'

Manitoban Gardener

Ranunculus'

by van der Meer Garden Centre on Mar 19, 2024
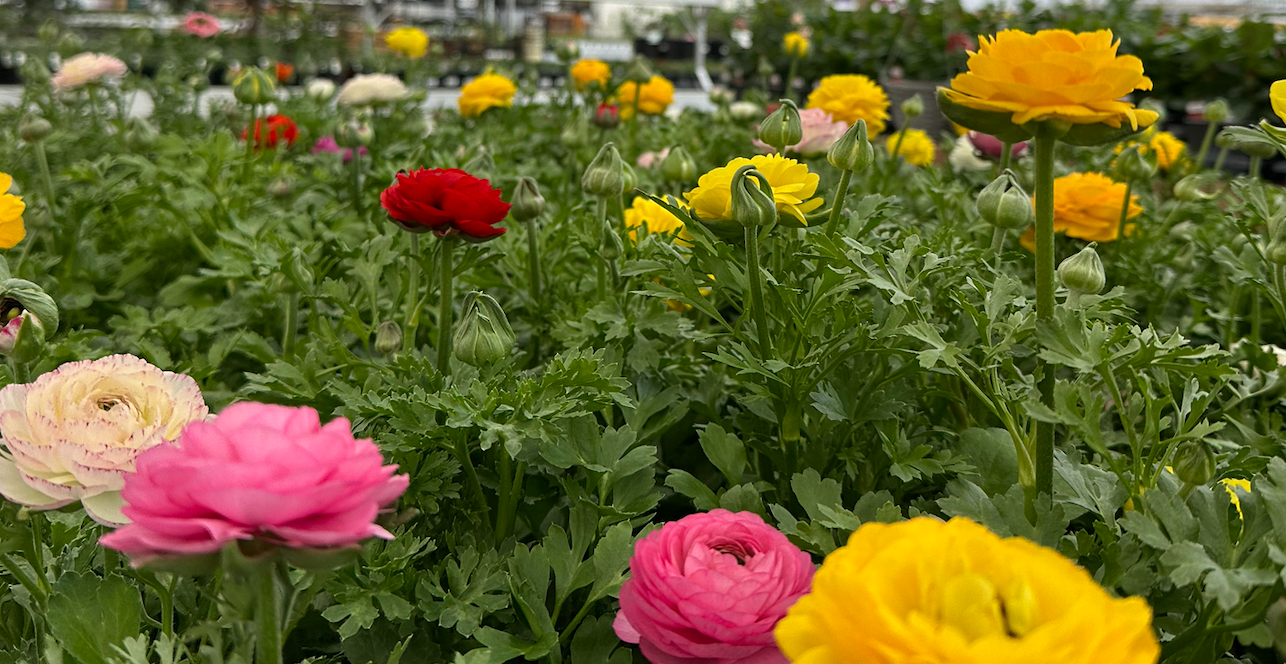
Ranunculus' are beautiful and amazing… corms? No, not corn but CORMS.  Now what are corms? Corms are simply energy storage systems: just like bulbs. They simply vary slightly in structure. While bulbs are layered with leaves somewhat like an onion, corms are a very thick root like a beet with all the energy stored inside. Both spend winter dormant and bloom in early spring.  Unfortunately in our zone (3a) ranunculus’ are not a perennial. Most are perennial only in zone 6 and above which means you can’t even get away with trying to find a cozy microclimate around your house. However because of their corms they can be dug up just like a bulb and replanted year after year.   You can easily buy ranunculus grown from seeds which will need all summer to develop a tiny little corm or you can buy the corms themselves. The seed-grown plants can be planted in the garden once the frost date is passed, make sure to plant them in full sun and be very careful about the temperature in early spring as they are not at all frost-tolerant.  The corms need a little bit more love.  When you get your corms they will look like odd little brown splat shapes. This is completely normal. Look them over for signs of mold or rot - the corm overall should be firm and dry. Before planting they need to sit in room-temperature water for 3-4 hours; any more and they will rot. After they soak they can be planted directly into the ground, splat arms down, or pre-sprouted which will trick them into sending out blooms earlier.  To pre-sprout, fill a flat-bottom seed tray half full of damp potting soil. Place and  cover the corms in more damp soil. Leave the tray in a cool place (4-10 ℃) for about 2 weeks checking every day and making sure the soil is damp but never soggy. Keep a watchful eye out for mold or rot and remove any corms showing signs of either. During this time the corms can swell to twice their original size and sprout white hair-like roots all over once these rootlets appear they are ready for planting.  You need to be careful about when you plant them however because if they are exposed to temperatures below -4℃ they will die away, you can avoid this by planting them in pots and bringing them in should the temperature become frosty. Since ranunculus’ need on average 90 days to bloom this also ensures you will have beautiful blooms before september.  Once the summer hits however, ranunculus thrive in the heat.  Most species need loamy aerated soil that is easy to grow in so if you have clay make sure you prepare the soil well by thoroughly mixing in a compost or peat to loosen the soil However certain varieties prefer their feet a bit wet for example Ranunculus repens varieties can even be grown next to ponds or in low lying areas and don’t care at all about being in clay.  Ranunculus have an outstanding vase life, often exceeding 10 days. Cut when buds are coloured and squishy like a marshmallow, but not yet fully open, for a vase life of 10 to 12 days. *Toxic to humans and cats and dogs if ingested in large quantities - know your pets, partners, and childrens garden grazing habits before deciding to plant in your garden.
Saving Spring Bulbs

Manitoban Gardener

Saving Spring Bulbs

by van der Meer Garden Centre on Mar 10, 2024
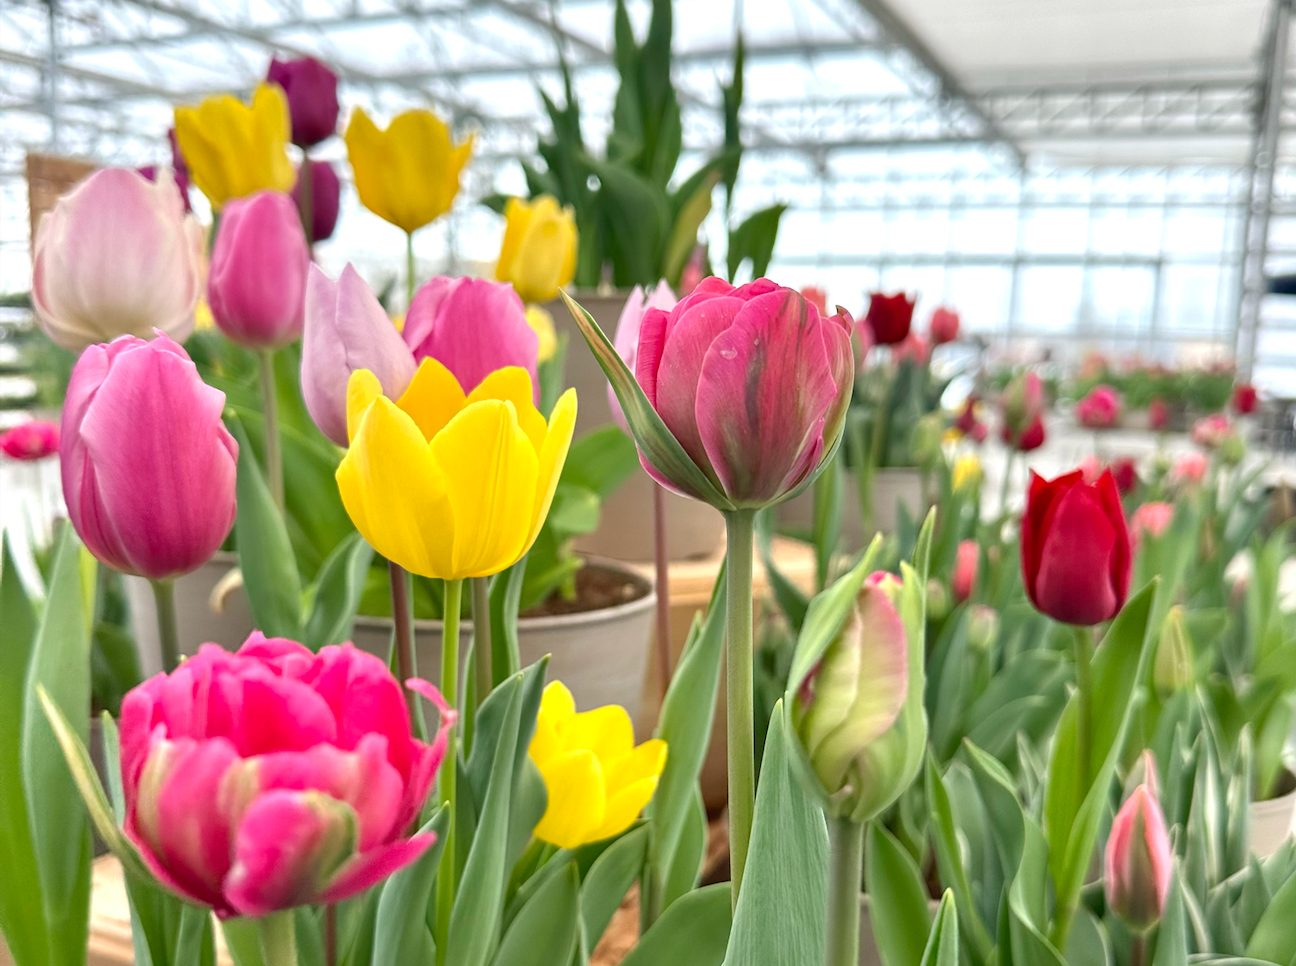
Out of all the flowers we grow some of the earliest bloomers come to us from bulbs. Beautiful tulips and crocus are the epitome of spring and their blooms bring joy to our winter weary souls.  Bulbs themselves are like little energy storage units, during their short lives they send out roots, leaves, and those lovely flowers like other plants but after they bloom they quickly begin to grab as much energy from the sun and soil and store it away for the next year. This is why, unlike perennials, bulbs will bloom and then begin to fade away - their foliage dying back along with their flowers.  All bulbs have different lengths of time they need before they return to dormancy. Tulips, crocuses, and other spring bulbs bloom quickly and fade quickly, often before the season is even over. While summer bulbs (or corms, or tubers, or all other manner of names for a rooted storage unit) may send out foliage similar to normal perennials and then only die back to the bulb once frost hits.  For this blog I’ll just be going over the spring bulbs we often find in pots for Easter. Forced Tulips, daffodils, hyacinths and crocus which were all grown to be as showy indoors as it is rock hard frozen outdoors. These bulbs are perfect for storing because they have a short growing season and do not need a lot of room compared to some summer bulbs.  Step 1: Buy some beautiful flowers! There are all sorts of lovely flowers on sale for the Spring and Easter season, choosing a pot with no flowers but lots of buds will allow you to enjoy every flower that is ready to bloom.  Common spring bulbs are Tulips tulipa  Crocus crocus  Hyacinth hyacinthus orientalis  Grape Hyacinths Muscari armeniacum Daffodils and Narcissus Narcissus pseudonarcissus. Step 2: Enjoy your flowers. Do not let them dry out just yet and place them in a relatively warm and sunny place.  Step 3: After they are finished blooming begin to restrict water and watch for dying leaves. In this case dampness can easily lead to rot so be very careful not to overwater - if you are worried don’t water - it's better to dry it out too quickly (this will not kill it) than overwater it (this definitely will kill it.) If it looks like it's dying from lack of water that's exactly what you want!  Step 4: Stop watering completely when the plant begins to droop or more than 50% of the leaves have died. If the soil is damp or the pot doesn’t have a drainage hole, remove the plant from the soil and hang it somewhere dark and dry. Make sure all the leaves and roots that are holding on stay on. Step 5: Once the bulb is completely dry (it is vital the bulbs remain dry or they will rot) remove all leaves and roots and place in a paper bag. Store in a dark, cool and dry spot until next season. For added peace of mind you can dust with a fungicide (cinnamon is a natural fungicide in a pinch but it isn’t as reliable as commercial ones) and add sawdust or shredded paper to the bag to absorb moisture.   Congratulations! You have successfully saved your bulbs for another day! As long as they stay dry and dark they will happily rebloom for you next year, most bulbs will last about 12 months this way - if you’re concerned make sure to search the storage times for your specific bulb.  If you would like to learn more here are the links to some of my research sites. Remember to always check what type of flower bulbs you have since different flowers will have different needs for growing and storing.  Happy planting! 
Peonies

Manitoban Gardener

Peonies

by van der Meer Garden Centre on May 19, 2022
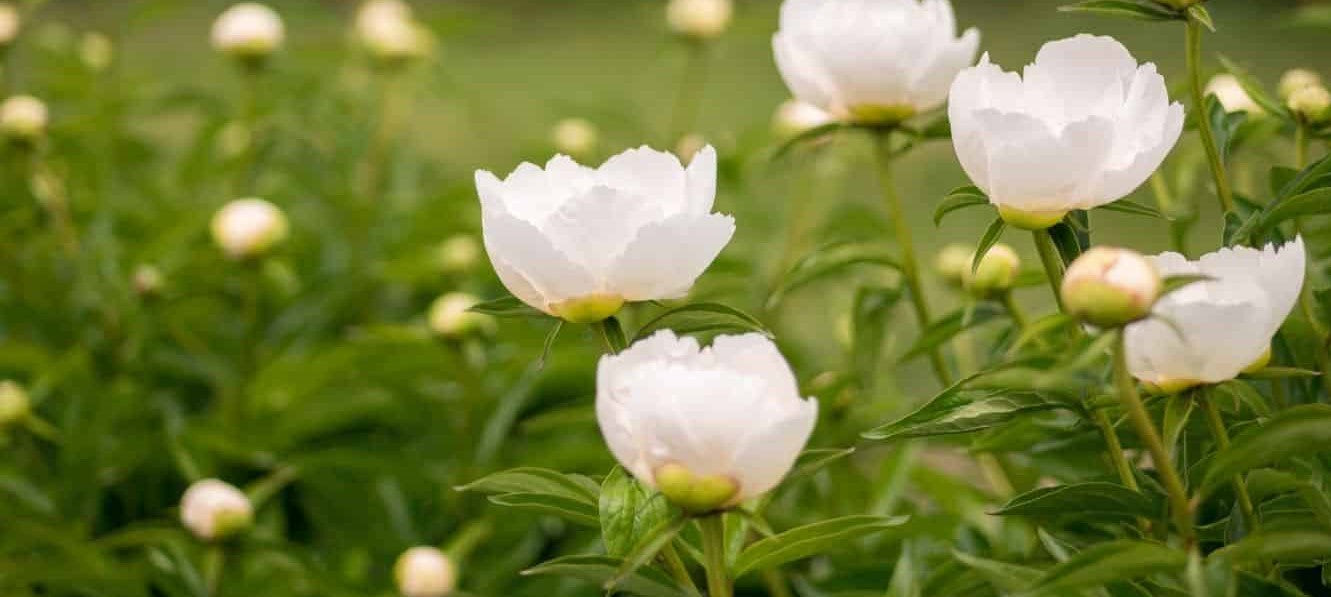
Peonies Their absolutely beautiful early summer display of stunning flowers enchant everyone who sees them. After the blooms are finished these bushy plants display their beautiful glossy leaves all summer and into fall. Peonies will tolerate our winters beautifully and can be quite happy being completely neglected.  Let's take a look at these amazing flowers that I absolutely adore Peonies come in 3 types: the herbaceous, the tree, and the Ihto. In Manitoba we only grow the Ihto and herbaceous varieties which die off in the fall and gather all their nutrients and energy into their roots in order to come back in the spring. Peonies like to be in bright sunny areas where they don't have to compete for a lot of nutrients. However these plants will survive in part-shaded areas providing they get a reasonable amount of sunlight. Take time to plant your peonies in the most advantageous spot because peonies do not like to be moved once they have been established. Not to say it is impossible however they do get rather grumpy being broken up, especially if they have not been properly established. Peonies thrive off of neglect so do not worry too much about fussing over your peonies as too much fussing, too much fertiliser, and too much disturbance of their roots will cause them to wither away. Instead add a bit of bone meal to the soil when they're planted and ignore them for a few years unless they need to be staked; their massive blooms often are too big for their stems and while they are blooming they often need a peony cage (in a pinch a tomato cage will suffice for a younger peony)  Once established peonies are well known for their longevity, sometimes even lasting up to a 100 years! Peonies coming a wide variety of colors and bloom styles there are  single blooms Japanese  anenome  semi double  bomb  and double blooms.  The blooms listed get progressively fuller of petals with the single blooms having a single layer of large petals and the double blooms being completely full of petals.  When you buy your peonies in the store don't worry if it doesn't have an enormous root system. The most important part of their roots are the tubers which are where they gather all their energy for the winter. Many peonies are about to bloom these days in greenhouses so don't be upset if you don't get any blooms this year but just you wait until next summer. Peonies bloom late spring to early summer. The blooms make excellent cut flowers. Bring them into the house when they are still tight buds in order to experience the full beauty. However if you do cut the buds for vases make sure that you tap off all the ants that have been climbing all over the peonies! Before peonies bloom they produce a sweet nectar over their buds and as they bloom the ants will be clamoring around to get the nectar. Please do not do anything to deter the ants from eating the nectar of the peonies as ants also will help the peonies by eating other pests they find on their way to eat the nectar. Once the flowers stop blooming the ants will be on their merry way.  Peonies are an incredible plant. Long lives, easy to take care of, and absolutely stunning. The highlight of my spring gardening so far has been to see the tiny little first leaves of my peonies! 
Helping out our pollinators

Manitoban Gardener

Helping out our pollinators

by van der Meer Garden Centre on May 12, 2022
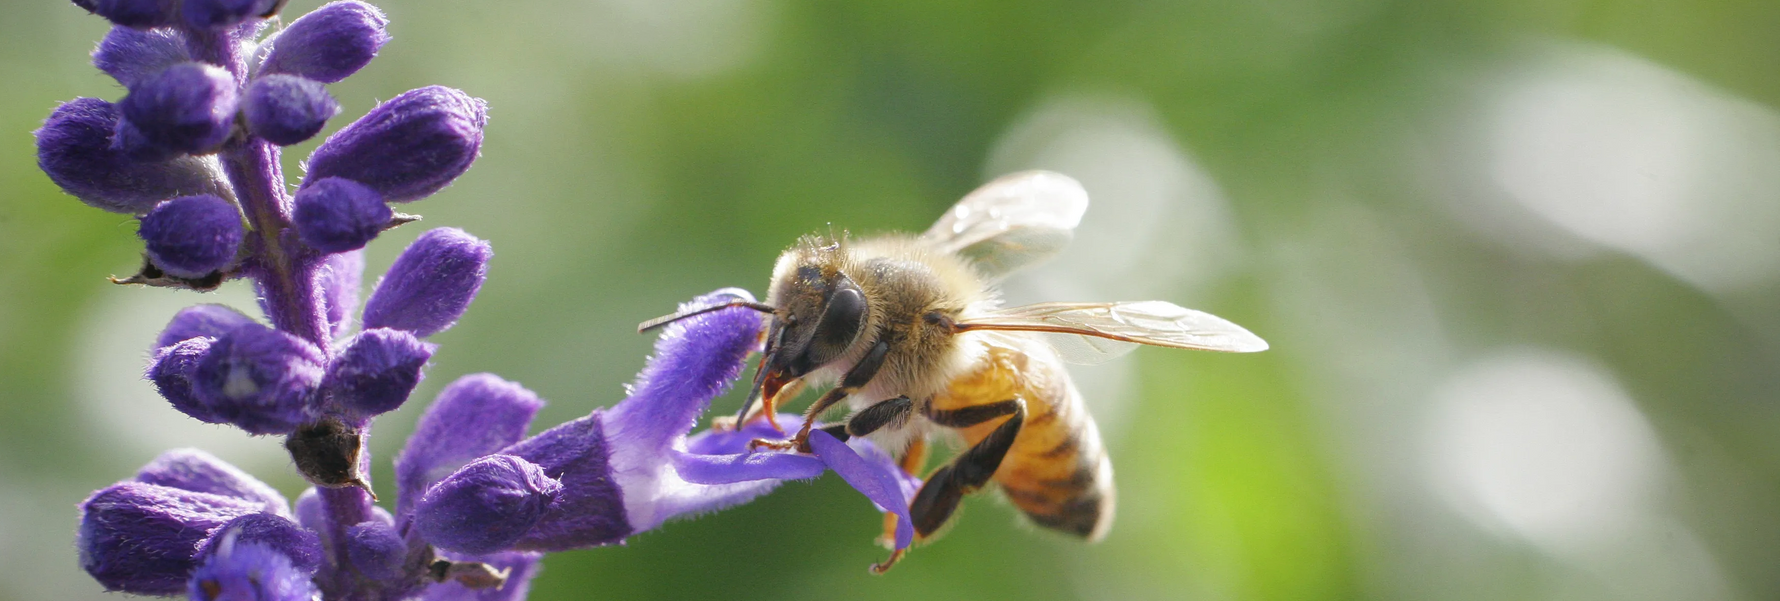
Helping out our pollinators.   Well it seems to be melting! Although the snow keeps coming back in spurts it seems like we're heading in the right direction towards growing things once again! As we head in this direction I want to take a moment for everyone to think about some of our hardest working gardeners out there: bees and all other pollinators.  As you may have heard bees are declining rapidly through many reasons. Some of them are man made, and some of them like certain fungus and mites from nature. Whatever the case, pollinators are a super important part of our gardening lives because without bees and other pollinators we will not be able to get our veggies or fruits without a lot of q-tips going from one flower to another. As the snow begins to melt let's think of some ways that we can help those pollinators  in our area.  The 1st way is not very pleasant for many people, especially those who take great pride in their lawns. However one of the 1st flowers that will ever pop up in the spring is going to be the much hated dandelion. Although dandelions are certainly weeds that I have spent more than my in my desired share of life yanking out of the ground I have recently learned how important they are to the pollinators 1st thing in the spring.  They represent a vital food crop especially when a lot of other flowers don't begin blooming until much later and dandelions probably will have bloomed once or twice by then. Allowing some dandelions to grow in your yard helps all pollinators which will attract them to your yard, which will then attract them to your garden, which will bring a bigger crop. Now obviously this isn't going to be a choice some people are going to want to take as the hatred of dandelions is long standing and extremely fierce throughout our society however it's just food for thought and more importantly it's food for the bees.  If the thought of the yellow flowers dotting your lawn makes you want to break out in hives (no pun intended… or is it?) Another way you can help early pollinators is by planting plants that you do like that will come up very early. Bulbs like crocuses and tulips planted in the fall are one of the 1st things to pop up out of the ground in the spring or you can grow flowers such as pansies which are frost hardy and can be placed out in flower pots and hanging baskets within the next few weeks. I let some of my pansies seed themselves last year and found a clump of them growing under the snow already. They should be flowering within the next couple of weeks right alongside those 1st dandelions. Another great option are shrubs that bloom super early. These shrubs such as forsythia and double flowering plum create flower buds in the fall before they go dormant and said buds boom before the plants leaf out. These shrubs are Manitoba hardy and very beautiful but you must remember not to prune them in the fall when they've already established where their buds are going to be for the spring. As the Spring goes on if you want to create a yard which will be filled with pollinators and will also help your garden don't forget to check out this list of perennial perennial favourites for all pollinators including the much more loved pollinators such as butterflies. See the websites at the bottom of the page for ideas. Pollinators are such an important part of our garden's success and in order to set up these little helpers we need to create environments for them to thrive. There are many people who have let their yards be taken over in order to attract pollinators. However this is a big change and not everybody gets ready for it. If you want to help some bees a little bit and you don't have much room or you're not willing to commit to losing your view of a beautiful green lawn, planting some flowering shrubs or even a beautiful flowering crabapple can be a great way to encourage pollinators in your area.  However don't forget if you're going to try to attract pollinators and you still are using heavy pesticides in your garden and your lawn; you're going to be end up killing them so try to either choose one or another either you want to attract pollinators to your yard or try to discourage them from your yards so that they do not die from the pesticides you plan to use.  Pollinator plant list - Click Here How to create a pollinator friendly garden - Click Here
Where is the sun?

Manitoban Gardener

Where is the sun?

by van der Meer Garden Centre on Apr 18, 2022
Where is the sun? This isn’t a really hard question, the sun is in the sky…sorry about that.  My real question is where is the sun in your yard?  Knowing where the sun is in your yard and knowing how long you get sun for in these areas can help you plan for a garden that will flourish. All plants need sun but some have evolved to need less than others and if these plants get too much sun they won’t flourish and may even die. Likewise plants that have evolved to need a lot of sun will be equally as upset when placed in a garden too shady for them.  Plants placed in areas where they are not meeting their sun or shade requirements are more susceptible to pests and diseases so knowing how much sun an area gets can help you plan what plants will grow the best. This is a great first step before planning a garden. It’s easy to get excited about a new plant and not realise that you have no suitable place to put it, only to have it wither away after receiving too much/not enough sunlight.  To determine if your garden is full sun or full shade check the areas during morning, mid-morning, and throughout the day until dusk. The easiest way to do this is to pick a sunny day that you have free and set a timer for every two or so hours,  keep a little notebook to check - sun or shade and track throughout the day. You will be able to easily determine if you are full sun, full shade or a partial sun or shade.  Full Sun or Full Shade.  These are the easiest areas to determine. If you have full shade you are likely to have tall trees around your home or more along the south side. Full sun will have fewer tall trees or trees that are mostly on the Northern side of your home.  Full sun areas will have sunlight from at least 10 am until around 5 pm or later. These areas will receive the hottest sun of the day and will benefit from plants that are drought tolerant and/or specifically bred for full sun. Full shade locations will get the morning sun but then be shaded fully from the afternoon sun or at least for a full 6 hours. These plants will be shade tolerant and will not tolerate any of the hot full afternoon sun without burning or crisping on their leaves, even if they are in full shade the rest of the time.  Part shade or Part sun You would think that these are the same thing but actually they are opposites. Part shade plants are plants that can handle mostly shade with a little bit of sun. They may be able to take full sun for a little while but are still at risk of burning if they dry out. These plants are not drought tolerant and will need to be kept mulched and well watered if put in an area that is sunnier than shadier. Part-sun plants are plants that can handle a bit of shade but prefer mostly sun. They will usually do OK in a shadier area but will be susceptible to overwatering and will not like full shade. This means that they will most likely not bloom and may become ‘leggy’ as they stretch for the sun.   I hope that these guidelines can help you plan for a garden that will really prosper. Although it can be disappointing to realise your garden is too shady/sunny for the plant you really want there are a few ways you can alter your surroundings so that your desired plant can thrive. The easiest way is to make shade where there is sun. A new tree, shrub or even a garden wall or screen can give your shade plants the extra hour or two of shade they need to thrive. Sun is a little harder but you can always look for trees that can be pruned to allow more light in or think about creating a garden bed in a different area that has more light.  Whatever you choose I wish you happy gardening! 
David Austin Roses

Manitoban Gardener

David Austin Roses

by van der Meer Garden Centre on Apr 09, 2022
David Austin Roses " Everyday, I marvel at my good fortune to have been able to make a life out of breeding roses. My greatest satisfaction is to see the pleasure my roses give to gardeners and rose lovers worldwide." - David Austin Snr.     When my mum , Lori van der Meer, told me she was getting some David Austin roses my first response was “oh lovely… what are those?”   David Austin is not a well known name for most Manitoban gardeners but over the next few weeks I hope to get you better acquainted with not only the name but the care and background of some of the roses.  But let's just start with the basics, who is David Austin and what are his roses like?  David Austin was born in Shropshire in 1926. Even as a young child he was fascinated by growing things and would go to visit his friends' nursery  during school breaks. He set on roses when he was in his early 20s and fell in love with the Old English roses which were falling out of fashion to the Hybrids which had a wider variety of colours and could repeat flower. He set about to create a rose that had the fragrance and beauty of the Old Roses with desirable attributes of a hybrid.  It took some time for him to succeed but he finally created his first rose ‘Rosa Constance Spry’ named after the famous floral designer.  Nurseries did not want to stock his roses because they felt they were  too ‘old fashioned’ and so he began to sell his roses from his home in Shropshire. He struggled for a few years because there were so many other Rose Nurseries to compete with but he eventually succeeded and became famous for his repeat flowering ‘English Roses’  In 1983 David experienced his first real breakthrough when he introduced three English Roses at the Chelsea Flower Show one of which ‘Rosa Graham Thomas’ has continued in popularity even until today.  Although not officially recognized as a separate class of roses his roses are known widely as ‘austins’ and have been separated into four groups  the Old Rose Hybrids, roses with the appearance of the Old Roses but recurrent, healthy and with a wide range of colours the Leander Group, often with Rosa wichurana in their breeding, with larger bushes and arching growth tending to make them pillar or low climbing roses the English Musk Roses, based on 'Iceberg' and the Noisette roses, with pale green, slender and airy growth. The musk rose scent is missing from most, though other scents are present in many. the English Alba Hybrids, with tall, rather blue-leaved bushes like the old Alba roses.   David Austin continued to work with roses his whole life, as did his son and now his grandsons. David Austin died recently in 2018 but his gardens and roses are famous to rose enthusiasts around the world.    Coming up soon will be  Rose varieties offered  Care of Austin roses  Surviving the cold… will they?  Pets, pets and fungus  Stay tuned!        Check out all the roses we have in-store this year! Product: David Austin Roses   Sources  https://eu.davidaustinroses.com/pages/david-c-h-austin  https://en.wikipedia.org/wiki/David_C._H._Austin 
Easter is here and our Easter specials have arrived!

Manitoban Gardener

Easter is here and our Easter specials have arrived!

by van der Meer Garden Centre on Apr 09, 2022
Easter is here and our Easter specials have arrived! At van der Meer greenhouses we have just gotten a whole load of beautiful flowers for Easter. I wanted to go through the flowers quickly to let you know the best way to keep care of them.  First up we have the beautiful and longtime favourite: Easter Lilies, also known as Madonna Lilies, or Lilium longiflorum. Easter lilies are best bought when they have fat buds just about ready to bloom so that you can enjoy their blooms as long as possible. Try to keep the plants in a bright but slightly cooler area of the house to keep those flowers around even longer. You can put the pot into a decorative planter if you like but try to make sure the pot has a hole in the bottom (remember if the pot doesn’t have a hole it's just a bowl) standing in water will rot your lilies roots leading to discolouration and wilting from overwatering. Trim off dying flowers to encourage new growth and enjoy these beautiful, white, trumpeted flowers!     Secondly we have the beautiful Hydrangea To keep Hydrangeas happy and healthy keep them in a cool place with plenty of light. Just like the Easter Lilies try to keep them from constantly standing in water, however if you do not have a place that is very cool make sure you keep an eye on how wet they are as they drink a lot of water in their small pots.  Hydrangeas at this time of year are forced which means they were given artificial light in order to bloom earlier than usual. This means if you wish to plant them in your garden you may find they do not bloom again for the rest of the year. They can be used as annuals for our climate but unfortunately Hydrangea macrophylla are a variety which cannot handle our winters. If you are interested in cold hardy hydrangeas check out our site for options as we are continually updating our selection.  Product: Hydrangea    Lastly but certainly not least, we have the ever classic Chrysanthemum.  With the widest variety of colours Chrysanthemums are a beautiful Easter decoration or gift. These lovely flowers will flower for around 5-6 weeks or more under good conditions and are extremely beneficial to have in the house because they have been known to act as air purifiers. Because they put in this hard work to filter the air they are often thirsty and need to have an eye kept on their soil so as to not let it dry out. Once the blooms are finished trim them off to encourage more blooms however do not be surprised if they do not bloom again. Chrysanthemums are forced to bloom for Easter and because of this they will not bloom again. Keep in a cooler area, most non-tropical house plants will prolong their blooms if kept in a cooler rather than hotter area. Unfortunately these varieties are not hardy to our climate. Although there are variations of Chrysanthemums that will happily survive our Zone 3 winters these are not them. Once they are finished blooming the best idea is to compost them.  For mums that are cold hardy (but not blooming yet) as well as these gorgeous Easter Mums take a look at our website.  Product: Easter Mums Have a Happy Easter and we wish you all the best with your flowers!
Seedlings

Manitoban Gardener

Seedlings

by van der Meer Garden Centre on Apr 03, 2022
Hello! Welcome to the very first post from van der Meer greenhouses! I just wanted to do a quick introduction of myself before we begin and don’t worry you can easily skip this paragraph if you want to. My name is Lauren van der Meer and I am part of the 3rd generation of van der Meers to work with van der Meer greenhouses. I have over 12 years experience working with plants and am so excited to be starting this blog.  It’s March and the minute that we hear the sounds of water running or we drive through that first puddle of the year we immediately want to run to Van der Meer Greenhouses, buy as many seeds as possible, fill up those seedling trays/ egg cartons/ pots with dirt, and start growing.  Before you go completely plant-happy there are a few things you may want to consider.  When should I sow my seeds?  Theoretically you can start seeds at any time of the year, however you have to ask yourself “how many zucchinis can I fit in my house before it thaws?” I have fallen victim to the urge to start all my seedlings the minute I see the snow begin to melt only to have far too many long leggy tomatoes that never made it into the garden.  According to the Farmers' Almanac “On average, your last spring frost occurs on May 21” that means on April 1st we still have 51 days until we can tentatively start planting in the garden. Some varieties of tomatoes grow from seedling to mature plant in 60 - 65 days meaning if you plant them inside they will be almost fully mature and have needed a much bigger pot to be planted in by the time you can bring them outside.  Now if you are planting one or two seeds - great no problem! Pot them up into bigger pots and enjoy having your cherry tomatoes by the beginning of June. However if you have plans to put upwards of 20 tomatoes in your garden you may want to rethink a few things - I cannot fit 20 2gallon tomatoes in my house and my garage does not have nearly enough light to sustain them.  So… what can I start seeding early?  Some plants to start early  Bell peppers / Hot peppers, a very long growing season and relatively small plants. Keep in the sunniest spot you can find.  Basil and most other herbs (NOT DILL): long growing season, keep warm.  Melons: a warning for these, they may need a long growing season but they also get rather big rather fast - plant into bigger pots and keep very warm.   Brassicaceae (latin family name of cabbages, broccolis, cauliflowers, etc) have long growing season, but can get leggy in the house. Some plants to not bother starting inside at all  Peas : grow so fast and very easy to seed in the garden.  Beans: see peas above. Lettuces: They can be started inside but they grow very fast and will most likely need to be harvested before you transfer them to the garden. Plant from seed in a garden or pot and don’t worry about moving them. You can seed a couple crops of lettuce in one season.  Root vegetables: very hard to transplant without delaying or stopping growth.    Dill: grows incredibly fast- will seed itself everywhere. At  the end of the post I have a link to a comprehensive seeding chart from the Farmers’ Almanac.  What do my seeds need to sprout? Each plant has unique seeding requirements you may want to look into. Most people read the seed packet but please be warned: they are not always correct.   Some areas of concerns are: Seeding depth: some plants want to be lightly covered in dirt, others want to be deeply buried, others still will refuse to sprout if covered, some seeds even want to be kept in the refrigerator for a month before they will think about sprouting (looking at you delphiniums!)  Heat and the amount of sunshine: are very important too. Some plants only sprout when they have a certain amount of heat during the day - this amount of heat can fry other seedlings.  Water: Some plants want to be watered until they are dripping wet - this will kill other seedlings.  Soil: The soil you choose for your new seedlings should be light and preferably new. Using old soil can present problems like funguses or harmful microbes that can stop seedlings from doing well. Since you don’t need that much of it, getting new soil for your seedlings each year is a great way to make sure they are given the best starting point. Van der Meer Greenhouses has an excellent supply.  As much as I would like to give you the exact requirements for each seed I have a maximum amount of words so I will instead suggest you take a quick minute to google any new seeds you’ve purchased and learn about, Planting depth Sun/Heat requirements Watering  Anything else (like being put in the refrigerator for a month)  However this is all for new seeds or seed you haven’t had success with: if you’ve seeded a plant before with success: keep doin’ what you’re doin.’  How many seedlings do I need?  This is an amazing question because it will be completely unique to you and your situation. But a blanket piece of advice is: you do not need more than 2 zucchinis… I kid… but this does apply to about 95% of the gardening population so please take a good look at your family and friends and their zucchini consumption abilities before you make the leap into planting more than 2.  It can be very tempting to plant every single seed that comes in the little packet but each of those plants will grow into a plant that is sometimes capable of producing upwards of 100 fruits (looking at you cherry tomatoes) which means you have to ask yourself “what are my plans for these plants?”  Realistically if you are planning to eat the tomatoes fresh you will only need one or two plants per person for the season, likewise if no one around you except yourself likes green beans a whole row of them could prove to be far too many. This of course all depends on if you want to take the time in August and September to can, freeze, or otherwise store your harvest. If this is something you enjoy and have time for: go for it! I myself hate canning tomatoes and therefore limit myself to four tomatoes a year but I have a lot of cold storage and am able to easily store a lot of squash and therefore I plant upwards of 10 squash plants.  When it comes to seeding your plants a good rule of thumb is to plant double what you need and then choose the strongest - healthiest plants from the group. The rest of these seedlings you can simply compost (and be surprised what starts growing in your compost later on). Any seeds that are leftover seal in the packet with tape and mark the year on them. Most seeds are good for around 2 years if stored in a dry cool area.  Now if I have reached you too late. I apologise but don’t despair. You have a lot of options for you and your seedlings.  Option 1. Make sure you transplant your seedlings once they have filled their current container with roots. This will help make sure your seedlings continue to grow and since this lengthens your growing season can help you get an early crop! Just remember to make sure they have a lot of sun and a big enough pot. If you find that you are running out of room remember that pets and children can be bundled up and put outside but plants cannot.  Option 2: Throw them out and start again (it’s still early enough!)  If your seedlings are stringy, droopy and overall very unhappy it is in no way too late to start over! Seeds can be purchased at Van der Meer Greenhouses in store. Option 3: Throw them out and swing by Van der Meer Greenhouses in May to purchase seedlings that are garden ready. Easy, fun, and the kids and pets can stay inside for the month of April.  Happy planting!  Sources  When to seed https://www.almanac.com/gardening/planting-calendar/MB/Winnipeg  Van der Meer Greenhouses online Home  https://vandermeergardencentre.ca/